Want something more than your usual skin tint and blush combo? Dive into our step by step make-up tutorial to level up your game. We’ll explain all the steps to applying a flawless full makeup look, from intricate eyeshadow looks to contouring.
How to Apply Makeup: A Step by Step Guide
The great thing about makeup is that it’s quite subjective. Pros have developed methods for different skin types, skin tones, and even the look they want to achieve. The makeup steps we’ll explain here are the basics, but as you gain more experience, you’ll likely develop your preferences.
But before you experiment on your own, it’s best to learn the basics first. Here they are:
Step 1: Moisturizer
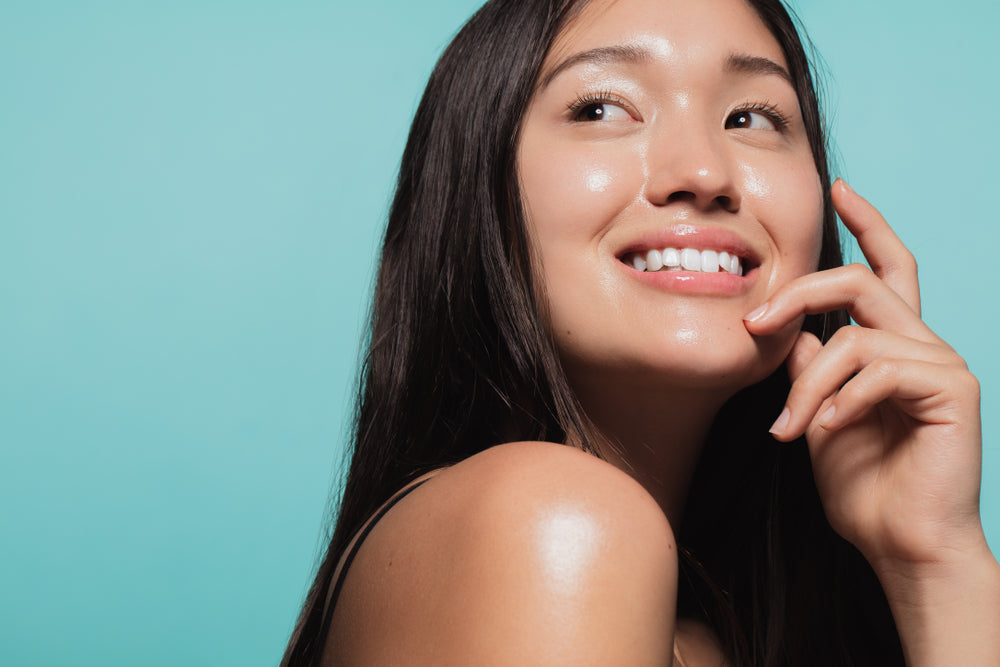
Healthy, hydrated skin is the canvas for any stunning makeup look. Choose a lightweight, non-greasy moisturizer that suits your skin type. For oily skin, opt for gel-based moisturizers; for dry skin, richer creams work wonders. Apply evenly over your face and neck using gentle upward strokes.
Step 2: Sunscreen
Never skip sunscreen. Protecting your skin from UV rays prevents premature aging and damage. Look for broad-spectrum SPF 30 or higher. Apply generously after your moisturizer and allow it to absorb fully before moving to the next step.

Step 3: Primer
Primer smooths out your skin's texture, minimizes pores, and helps makeup last longer. Silicone-based primers are excellent for blurring imperfections, while hydrating primers add a radiant glow. Use a pea-sized amount and blend evenly over your face.
Quick tip: Make sure that your primer and foundation are made with the same base (water or silicon) otherwise they will not blend seamlessly on your skin.
Step 4: Eyeshadow
Your eyes are the focal point of any makeup look. It’s best to apply eyeshadow before the foundation to make it easier to clean up any eyeshadow fallout, especially if you’re using dark eyeshadows.
There is no one way to apply eyeshadow – some people simply apply color to their lids – and you’re more than welcome to experiment. However, if you want to create a specific look, here’s the step-by-step eye makeup tutorial:
Classic Smokey Eye
The smokey eye is a timeless classic that exudes confidence and drama.
-
Base: Apply a neutral matte shade all over the lid.
-
Crease: Using an eye contour brush, apply a medium brown or taupe shade along the eye crease for definition.
-
Lid: Using a smaller blending brush, pack a dark shadow like chocolate brown or charcoal black on the outer corner, blending inward.
-
Blend: Soften any harsh lines between the darkest and middle shades with a clean blending brush.
-
Highlight: Using your finger or a clean flat blending brush, dab a shimmery shade on the inner corner and brow bone.
-
Liner: Finish with a smudged black eyeliner for a sultry effect. To do this, line the top of your upper and bottom lashlines with black pencil eyeliner. Smudge the eyeliner with a brush.
Korean Eye Makeup
This is your go-to if you want to recreate your favorite Kdrama or Kpop stars’ shimmery eye looks. Here’s how:
-
Base: Start with a pale peach or pink eyeshadow.
-
Gradient: Apply a slightly darker shade to the outer third of the eye, blending gently.
-
Shimmer: Apply shimmer from the inner part of the eyes to the middle.
-
Aegyo-sal: Highlight the under-eye area with a soft shimmer to create the signature Korean youthful look.
-
Eyeliner: Use brown eyeliner to create a subtle wing that follows your natural eye shape.

Natural Eyeshadow Look
Natural eyeshadow looks are perfect for daily wear, giving you that polished yet understated vibe.
-
Base: Use a nude eyeshadow that matches your skin tone. Apply this across your eyelid.
-
Crease: Apply a light brown shade in a v shape on the outer side of the eyelids. This will create subtle definition.
-
Lid: Add a soft shimmer or satin finish shadow on the center of your lids for a hint of glow.
-
Blend: Use a clean blending brush to ensure all edges are well-blended for a seamless look.
Step 5: Color Correction
Color correctors make the foundation’s and concealer’s jobs easier by neutralizing any unwanted tones, such as dark circles and redness. Here’s how to apply color corrector:
-
Simply apply a thin layer of color corrector onto the area that needs correction.
-
Lightly tap the product to make it adhere to your skin.
Color correctors, like the Pixi CC Crayon comes in multiple colors, each serving a different purpose:
-
Peach or Pink - Brighten and balance out bluish under-eye circles
-
Orange - Neutralizes dark spots and eye circles with bluish hues
-
Green - Neutralizes redness
-
Purple - Brightens sallow skin

Step 6: Foundation
Foundation makes sure that your skin tone appears even. It also serves as a base for the other products you apply, ensuring they blend well and adhere to your skin for hours. Here’s how to apply foundation step-by-step:
Applying Liquid Or Cream Foundation
-
Start with a damp beauty sponge or a foundation brush.
-
Squeeze foundation onto the back of your hand. Pick up some foundation with the beauty sponge or foundation brush. Alternatively, if you’re using a cushion foundation, you may pick up the product straight from the container.
-
Pat the foundation on your cheeks, then chin, nose, and forehead.
-
Blend outward using dabbing or stippling motions for an airbrushed finish.
-
Repeat the process if you want more coverage. But build coverage gradually to avoid cakiness.
-
Apply any remaining product to your neck and ears.
Applying Powder Foundation
-
Use a dense powder brush or kabuki brush to pick up powder foundation. Make sure there is an even amount of powder on the brush.
-
Buff the powder onto your skin using circular motions.
-
Focus on areas needing more coverage.
Step 7: Concealer
Concealer has a thicker formulation than foundation because it’s designed to cover up blemishes and uneven skin tone. There are two ways to use concealer: to brighten your face (adding dimension) and to cover blemishes.
To brighten your face:
Apply small dots of concealer under and on the outer corners of your eyes. With your beauty sponge, press on the concealer, spreading it only ever so slightly to make sure it blends seamlessly.
To cover up blemishes:
Dot concealer on any blemishes or redness. Blend with a small sponge or brush. For stubborn blemishes, let the concealer sit for a minute before blending for better coverage.
Step 8: Contour/Bronzer
Contour and bronzer add color and dimension to your face. Contour creates shadow, so it’s used to sculpt and define your face (think Angeline Jolie cheekbones) while bronzer gives you a sun-kissed glow (ala Nadine Lustre). These two are used and applied differently. Here’s the makeup tutorial:
Applying Contour
-
Use a cool-toned contour powder or cream.
-
Apply under the cheekbones, along the jawline, and the sides of your nose.
-
Blend thoroughly to avoid harsh lines.
Applying Bronzer
-
Swipe your Pixi On-the-Glow Bronze over the temples, cheeks, and jawline where the sun naturally hits your face.
-
Blend it out with your hands or a brush for a sun-kissed, radiant effect.
Contouring sculpts your face, while bronzing adds warmth and dimension.

Step 9: Setting Powder
Lightly dust translucent setting powder on areas prone to oiliness, like your T-zone. Use a fluffy brush and avoid over-powdering to keep the skin looking fresh and natural.
Step 10: Blush
Foundation and concealer makes your skin look even, which can make you look like a caricature. This is why we need to add color back with blush.
Depending on your blush’s formulation, you can either use a brush or your hands. What’s more important is where you apply the blush on your face so it’s most flattering.
Blush Application Tips for Different Face Shapes
-
Round Face: Apply blush slightly higher on the cheekbones and blend toward the temples.
-
Oval Face: Apply directly on the apples of your cheeks, blending outward.
-
Square Face: Focus on the apples and blend toward the ears to soften angles.
-
Heart-Shaped Face: Apply slightly below the apples to balance the forehead and chin.
How to choose a blush? Cream blushes like the Pixi On-The-Glow Blush in Cheektone offer a natural, dewy look, while powder blushes give a classic matte finish.

Step 11: Highlighter
Apply Pixi On-the-Glow SuperGlow on the high points of your face: cheekbones, bridge of the nose, cupid’s bow, and brow bone. Use a fan brush or your fingers to spread the product for a luminous glow that catches the light beautifully.

Step 12: Eyebrows
Well-groomed brows frame your face and enhance your overall look. If you want to have clear, defined eyebrows, a pencil may be your best choice. However, if you want to tame your unruly brows and maintain a subtle look, opt for a brow gel.
Here’s the tutorial for applying eyebrow makeup:
Applying Pencil
-
Start by outlining the bottom of your brows.
-
Fill in sparse areas using light, hair-like strokes.
-
Use a spoolie to blend for a natural finish.
Applying Brow Gel
-
Brush the gel through your brows in an upward motion.
-
Continue brushing your brows up and out until you’re satisfied with the shape.
Step 13: Mascara
Mascara enhances your eyelashes, giving your look a more dramatic effect.
Curl your lashes first for maximum lift. Look down and start curling your lashes from the roots to the tip.
Apply mascara starting at the base of your lashes, wiggling upward to separate and lengthen. Apply 1-2 coats for better length or definition.
Step 14: Setting Spray
Lock in your makeup with a setting spray. Close your eyes and hold the bottle 8-10 inches away and mist evenly around your face. This helps your makeup last all day and prevents it from settling into fine lines.
Step 15: Lips
Choose a lip color that complements your overall look. For long-lasting wear:
-
Exfoliate and moisturize your lips first.
-
Apply a lip liner to define and prevent feathering.
-
Fill in the rest of your lips with your Pixi Lip Tint or choice of lipstick, careful not to go over the line. For bullet lipsticks, you may use a lip brush for better accuracy.
Matte, satin, or glossy finishes all have their charm. Pick one that matches your vibe for the day!

You’re Ready to Glow!
Seems easy enough, right? Just keep following this step-by-step guide on how to apply makeup and you’ll soon be a pro.
Makeup is an art form that allows you to express yourself, boost your confidence, and have fun experimenting with new looks. Remember, practice makes perfect. Don’t be afraid to try different techniques and products until you find what works best for you.
For more beauty tips, product recommendations, and expert insights, explore the Glam.ph blog.